Adding a printer connection via TCP/IP
If you have a unix/linux account with printer access, please use that instead. You can add the printer via its “Samba” print queue, such as \\servername\lp###
For those
with no unix / linux account, some printers permit direct connections.
Here are the steps to add a printer with a direct TCP/IP connection. You will
need to know the IP address of the printer.
These steps
are illustrated for Windows XP; the steps for Windows Vista are similar
(cosmetic details of some windows may differ.)
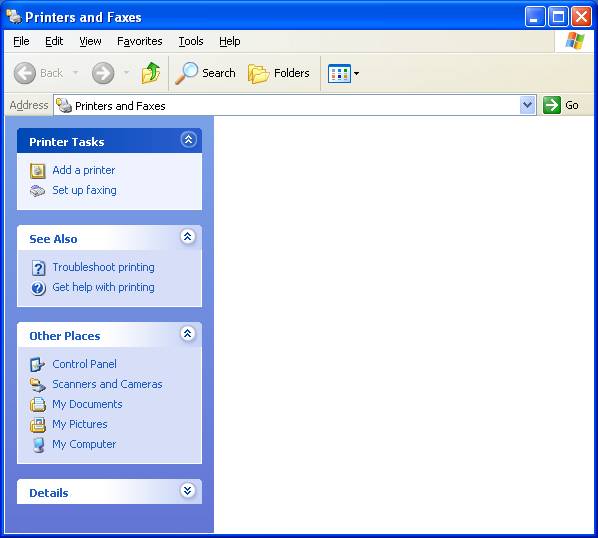
In the Start menu
choose "Printers and Faxes":
Click "Add a
printer"
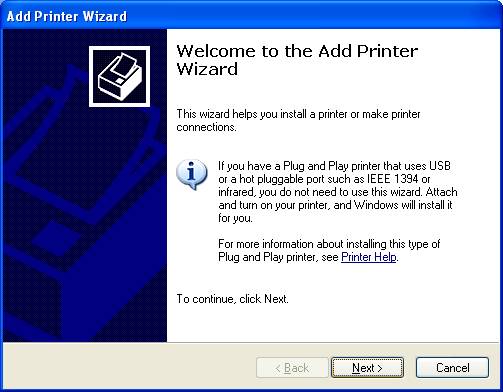
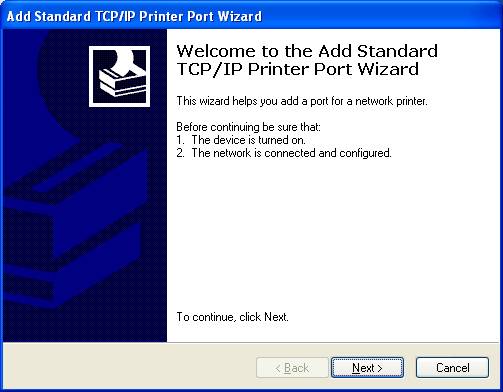
click "Next"
In the "Local or
Network Printer" window, select "Local printer attached to this
computer"
and UNcheck
the box for "Automatically detect and install my Plug and Play
printer":
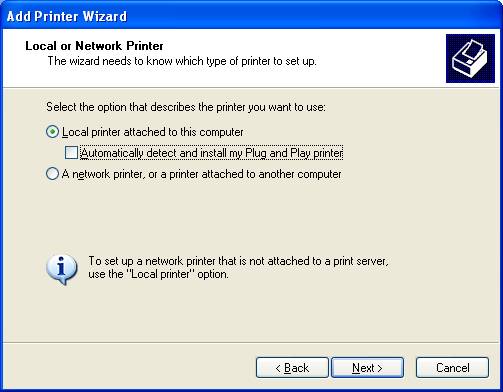
Click
"Next"
In "Select a
Printer Port", click "Create a new port"
In the drop-down menu
beside "Type of Port", choose "Standard TCP/IP Port":
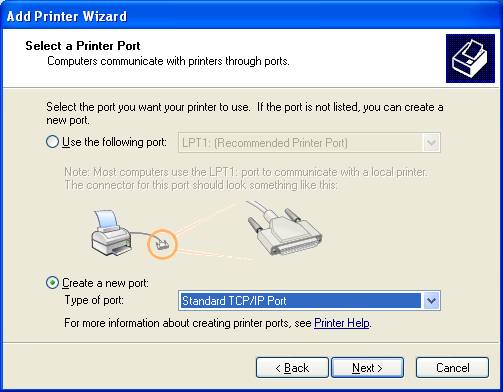
click "Next"
If you use wireless,
be sure the connection is active and you are authenticated on the
network - visit any outside
website to confirm.
If you use the VPN to
reach your printer, start the VPN now if it is not already on.
Click
"Next"
For "Printer
Name or IP Address" fill in the IP address of your printer.
(The "Port
Name" box will be completed automatically.)
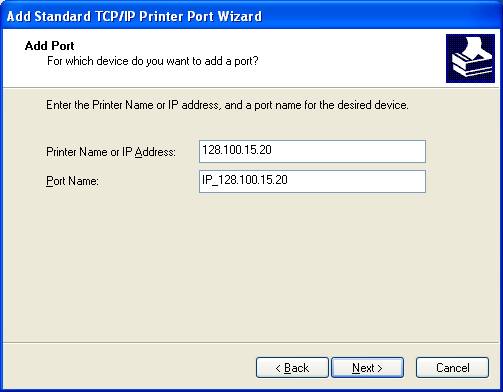
Click
"Next"
If you have a direct
path to the printer over the network, the next screen is not shown;
if you connect over the
VPN or wireless, you will be asked for "Additional Port Information":
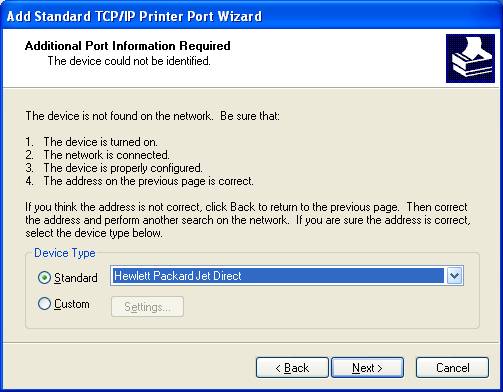
Click the drop-down
menu beside "Standard" and choose "Hewlett Packard Jet
Direct"
Click
"Next."
On the Completing the
Add Standard TCP/IP Printer Port Wizard window, click "Finish":

Next choose the
printer brand (click in the left column and type H to jump to "HP")
Then choose the
printer model - scroll half-way down the long list of models in the
right column and choose HP
LaserJet 4050 PCL6 or HP LaserJet 4250
PCL6 (either is okay):
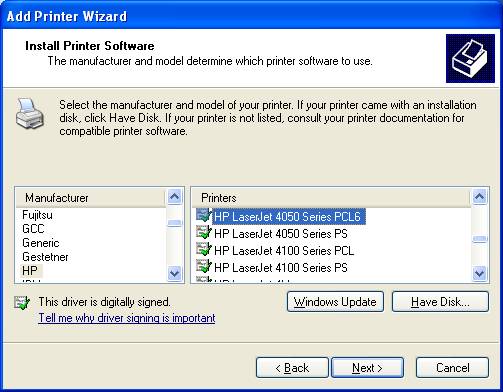
Click
"Next".
In the "Name
Your Printer" window, edit the name to show the room number, for clarity:
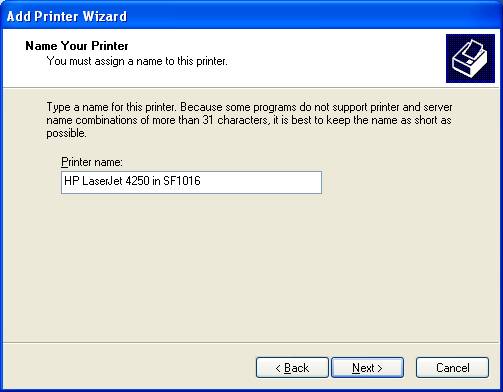
Click
"Next"
In the "Printer
Sharing" window, leave it set at "Do not share this printer" and
click Next:
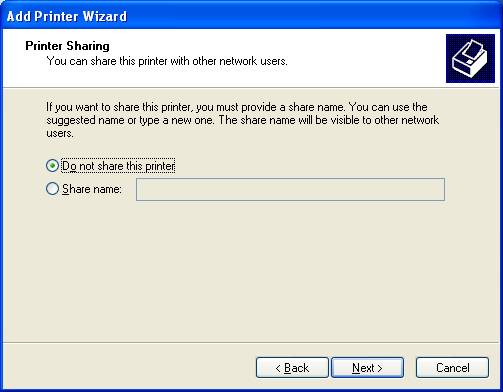
Click
"Finish"
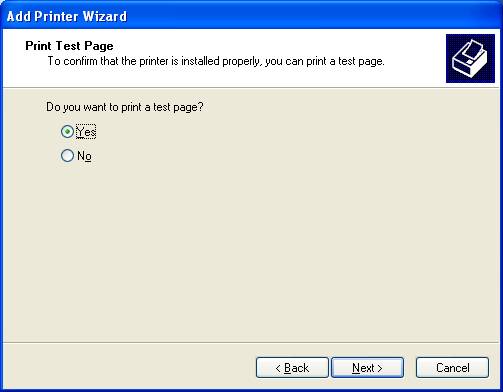
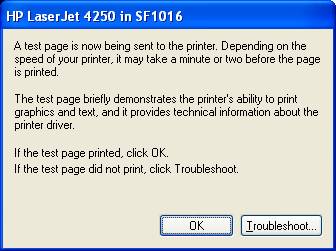
To send a test page
and verify your connection, click "OK" in this window:
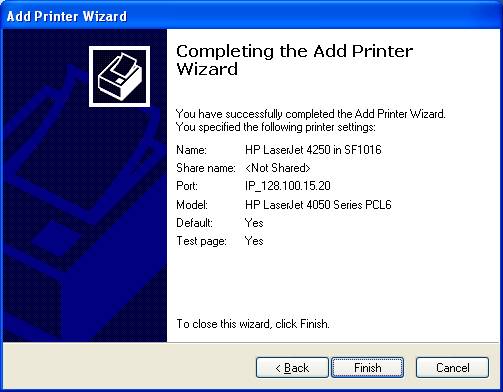
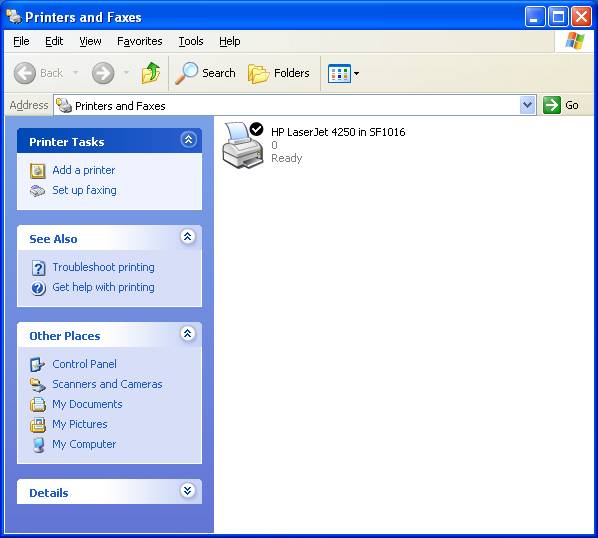
Now the printer icon
is created in the "Printers and Faxes" window:
Right-click on the
printer icon and choose "Properties" from the context menu.
In
the Properties window, click on the Device Settings Tab.
Scroll down to
Installable Options.
Click on Printer
Memory and set the drop-down menu to a higher number such as 60 MB.
Click on Duplex Unit
and set the drop-down menu to show "Installed":
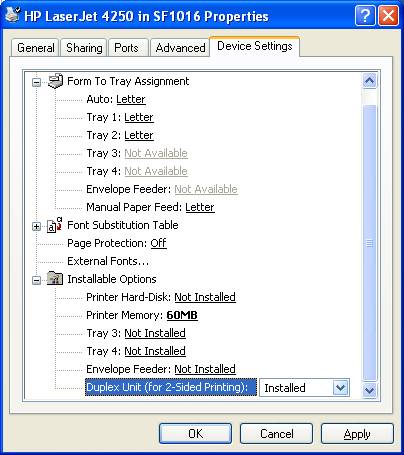
Click OK.
Right click on the
printer icon and choose "printing preferences"
In the Printing
Preferences window, click on "Flip on Long Edge" under "Print on
Both Sides" to always use two-sided printing (you can override this option
on individual print jobs if needed.)
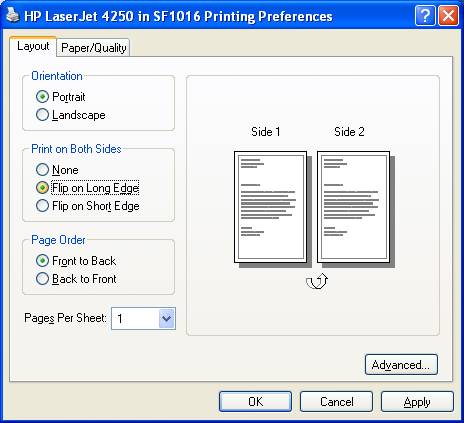
Click OK.
Now you are ready to
print.