How to map your ECE "Samba" network share
in Windows 7
These steps apply to users in UofT’s
ECE department who have a Unix/Linux system account, which includes use of a
Samba file server, and print server access to managed printers. If you do not
have a system account but need to print to a managed printer, please contact
your supervisor for approval to set up an account. If you don't know your Samba
password (which may be the same as your system login, or may be different),
then contact ECEHELP.
If the Samba server is not inside the same ECE firewall as your computer,
or to connect from wireless or from off campus, you must first connect to the
ECE VPN before mapping the network share, and you’ll need to connect to the VPN
any time you need to reconnect. There is one ECE firewall for Tier 1, a
separate ECE firewall for the Tier 2 subnets (128.100.23.0/24 and
128.100.241.0/24), and separate user-managed firewalls for each Tier 3
user-managed subnet. (If you need a login on the ECE VPN, email a request to ecehelp {at} ece dot utoronto dot ca with your name,
program/status, and supervisor's name.)
The order of major steps is:
·
Connect to the ECE VPN if required
·
Map network drive to your Samba home directory
With the VPN connected if required, in the Start menu choose
"Computer"
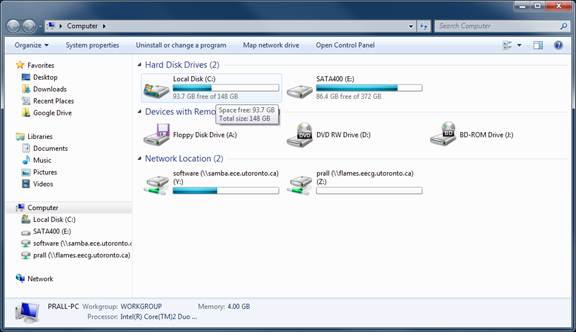
To map the Samba home directory, Click on "Map network drive":
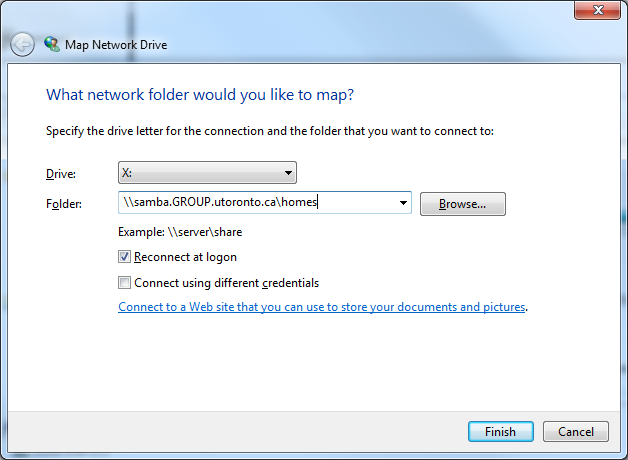
Replace \\samba.GROUP.utoronto.ca\ homes with \\samba.ece.utoronto.ca\homes
.
Leave "reconnect as logon" checked, as you'll want this volume
mounted each time you log in.
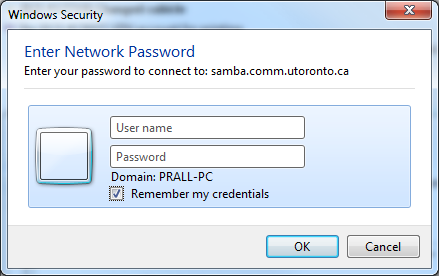
If prompted, enter your Unix login name and your
Samba password and click Okay. You may want to check "Remember my
credentials" so that "reconnect at login" will set up this share
mapping each time you log in without re-prompting.
Finally, click "Finish."